
Making bread using natural yeast. You know it as sourdough, but what’s really going on? essentially it is water and flour that you let sit out on your countertop at room temperature, and naturally ferment. What is really happening? Natural yeast in the air is finding a warm, moist environment to call home, and feeding on the mixture of flour and water. Those natural yeasts ferment to give it the nuanced “sour” flavor and are also responsible leavening our bread. When you’re developing your starter, you want to leave it out on the counter top for at least a week, and feed it every day. Feeding just means add water and flour, and that makes sense because the yeast thrives in a moist environment, and the feeds on the flour.
There are many methods to grow a starter but I find most of them overly complicated. All you need is a container, water, and flour. Weigh the container first, and write down the weight on the container, then add equal parts flour and water. I recommend whole wheat flour or bread flour, or a combination, and add warm water. Yeast loves the temperature around 100 degrees Fahrenheit so add water that’s about 100 degrees. Makes sense, right? And what’s the easiest way to do that? Turn your faucet to hot and stick your hand under the water. Your body temperature is roughly 98’ so if the water feels warmer than your skin but not hot to the touch then it’s roughly 100 degrees. Don’t overthink it. It’s not as easy to mess it up despite what you might believe. Your starter is very resilient. Here’s your first cheat- add water and flour to your container, and then mix it with your bare hand. Your hand also has natural bacteria on it that will help start the starter.
Cover the container, and let it sit on your counter for 48 hours before the first feeding. When you’re building your starter, I like to add equal weights of existing starter, flour, and water. We do this early on because we don’t have a healthy, living, starter yet so the more food we give it to eat the better it will grow. Eventually the starter will be so healthy we will only needs a fraction of the starter per feeding. For the first we will add equal parts so if your starter weighs 200 grams then add 200 grams of flour and 200 grams of warm water- that’s your first feeding. Do this every day for week, and you’ll get a nice, healthy starter.
Once it is healthy you will add about 20% of the starter weight to the amount of flour and water for each feeding. For example, if you use 100 grams of flour and water then you will add 20 grams of starter. Why do we do this? Is it because it’s healthier? Some people might say so, but the layman in me will tell you the reason is much simpler. It’s because you only have so much space, and every time you feed it it will grow and expand. You also only need so much starter to make a loaf of bread so unless you’re a professional baker you won’t need an industrial size container sized starter.
If your starter develops a brownish liquid on the surface don’t freak out- we call that hooch, and it simply means your starter is hungry and needs to be fed. Mix the hooch back in, with your hand, when feeding
Ok- got all that? If not shoot me a question, and I’ll do my best to help you out.
Now time to make bread.
Feed your starter the night before so it’s nice and bubbly, and ready to go. In your mixing bowl you’re going to add your starter, your warm water, and your flour, and that’s it. Using a dough hook mix it slowly until the flour is incorporated, and then turn it up until it pulls away and slaps the bowl. Cover the bowl, and rest for an hour- this is called the first turn.
Mix salt into some warm water and add to the dough. Mix. If your dough appears very wet, and a little flour just to absorb some of the moisture. Cover and rest for the second turn.
Mix again, remove from bowl, fold it over itself, and let rest. Third and final turn.
Let’s make the loaf. Place your dough on a floured surface and use your fingertips to press down on the dough. It will look like you given the dough a cratered surface. Pull one side out and fold to the center, and do the same with the other side. Then fold the bottom to the top and pinch the seam together to seal the dough. This is your loaf. Place in the loaf basket line with a flour kitchen towel, seam side up. Cover and refrigerate over night or at least a few hours. This is called retarding the dough, and it gives yeast more time to slowly ferment, and develop a deeper flavor without over proofing your dough.
Ready to bake.
There’s really only two things you need to do to make sure you make a delicious loaf
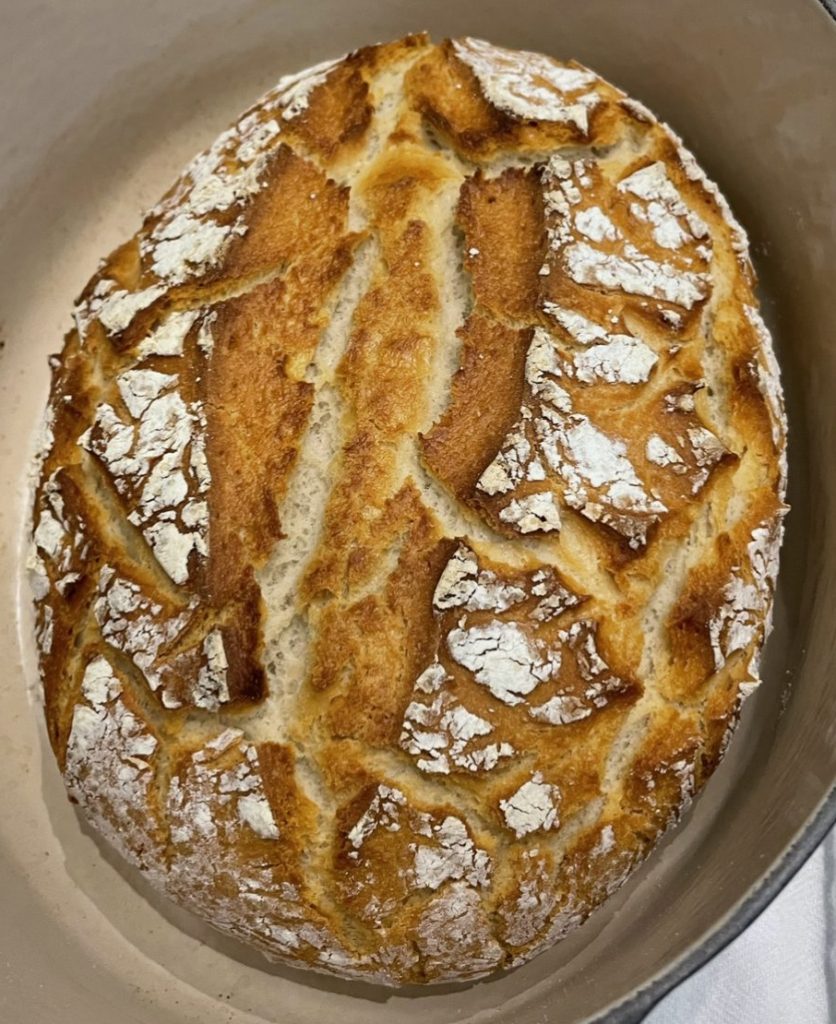
1) Pre heat your oven to 450 degrees Fahrenheit with your Dutch oven inside so that the pot gets nice and hot. Why? It will create that beautiful crust you want but also it helps with step 2
2) Score your dough, and then with a spray bottle mist your dough with water and cover. Because your pot is preheated the water will create steam which helps the dough develop a chew. That’s it. Bake at 450’ covered for 20 minutes, uncover, and bake another 20 minutes. Remember if your crust starts to look charred that’s good! It’s proteins and sugars caramelizing like when you sear a steak- it’s called the Maillard reaction, and it’s flavor!